

Setting Up Your Lab Workspace
Ensure you haveuv installed for managing Python packages:
prime CLI:
~/dev/my-lab) and do:
Python project bootstrap
Creates a Python project and installs
verifiers for environment development.Coding-agent setup
Configures your workspace for coding-agent workflows.
Instruction files
Downloads agent instruction files like
AGENTS.md and Agent Skills.Starter configs
Downloads example training and evaluation configs.
Prompting Your Coding Agent
For many low-to-medium complexity environments, we find that the latest coding agents are often capable of “one-shotting” them, when equipped with the provided context fromprime lab setup and given a sufficiently detailed prompt.
Providing the prompt below to a frontier coding agent (OpenCode + Codex 5.3) resulted in a fully functional environment for a calendar scheduling agent:
Save this as
prompt.md and pass it directly to your coding agent as your initial task prompt.prompt.md
prime/calendar-scheduling
Environments Hub
Hosted Training
After the environment is created, we prompt our agent to test performance more exhaustively, then to start a Hosted Training run usingQwen/Qwen3-30B-A3B-Instruct-2507, which is available via Hosted Training.
[wandb] and [eval] blocks. For the current format and a worked example, see End-to-End Run.
Keys your environment needs go in a file you pass at dispatch rather than in the config:
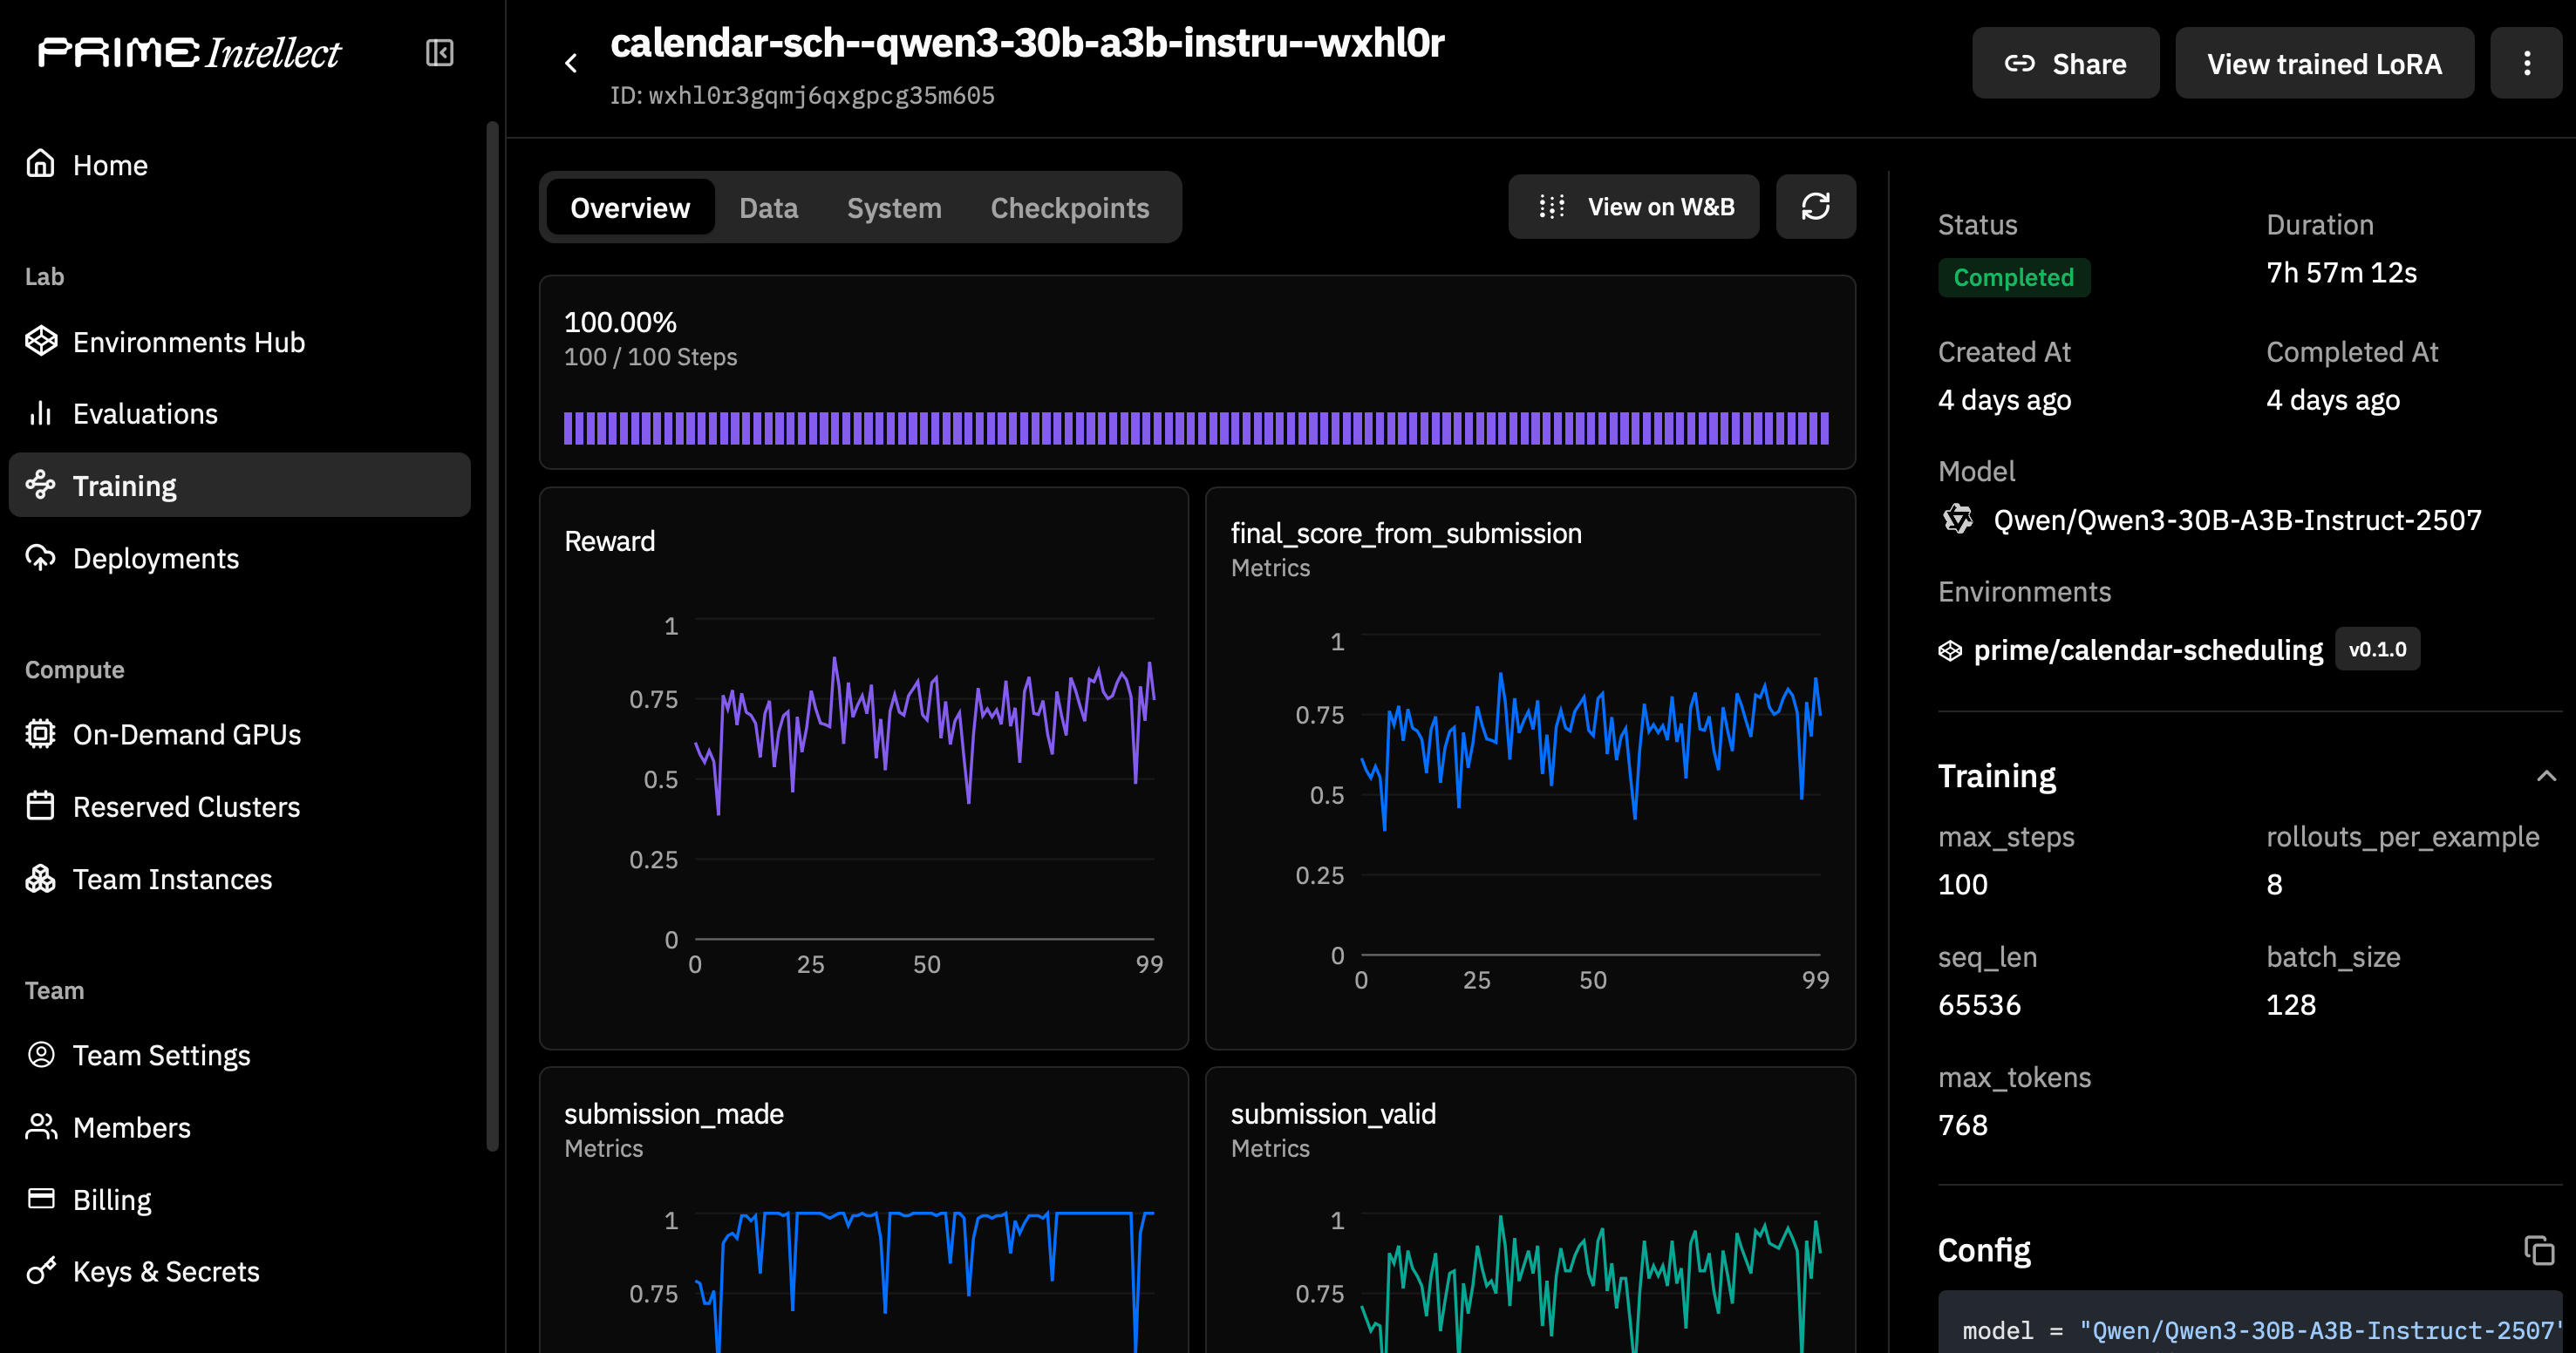
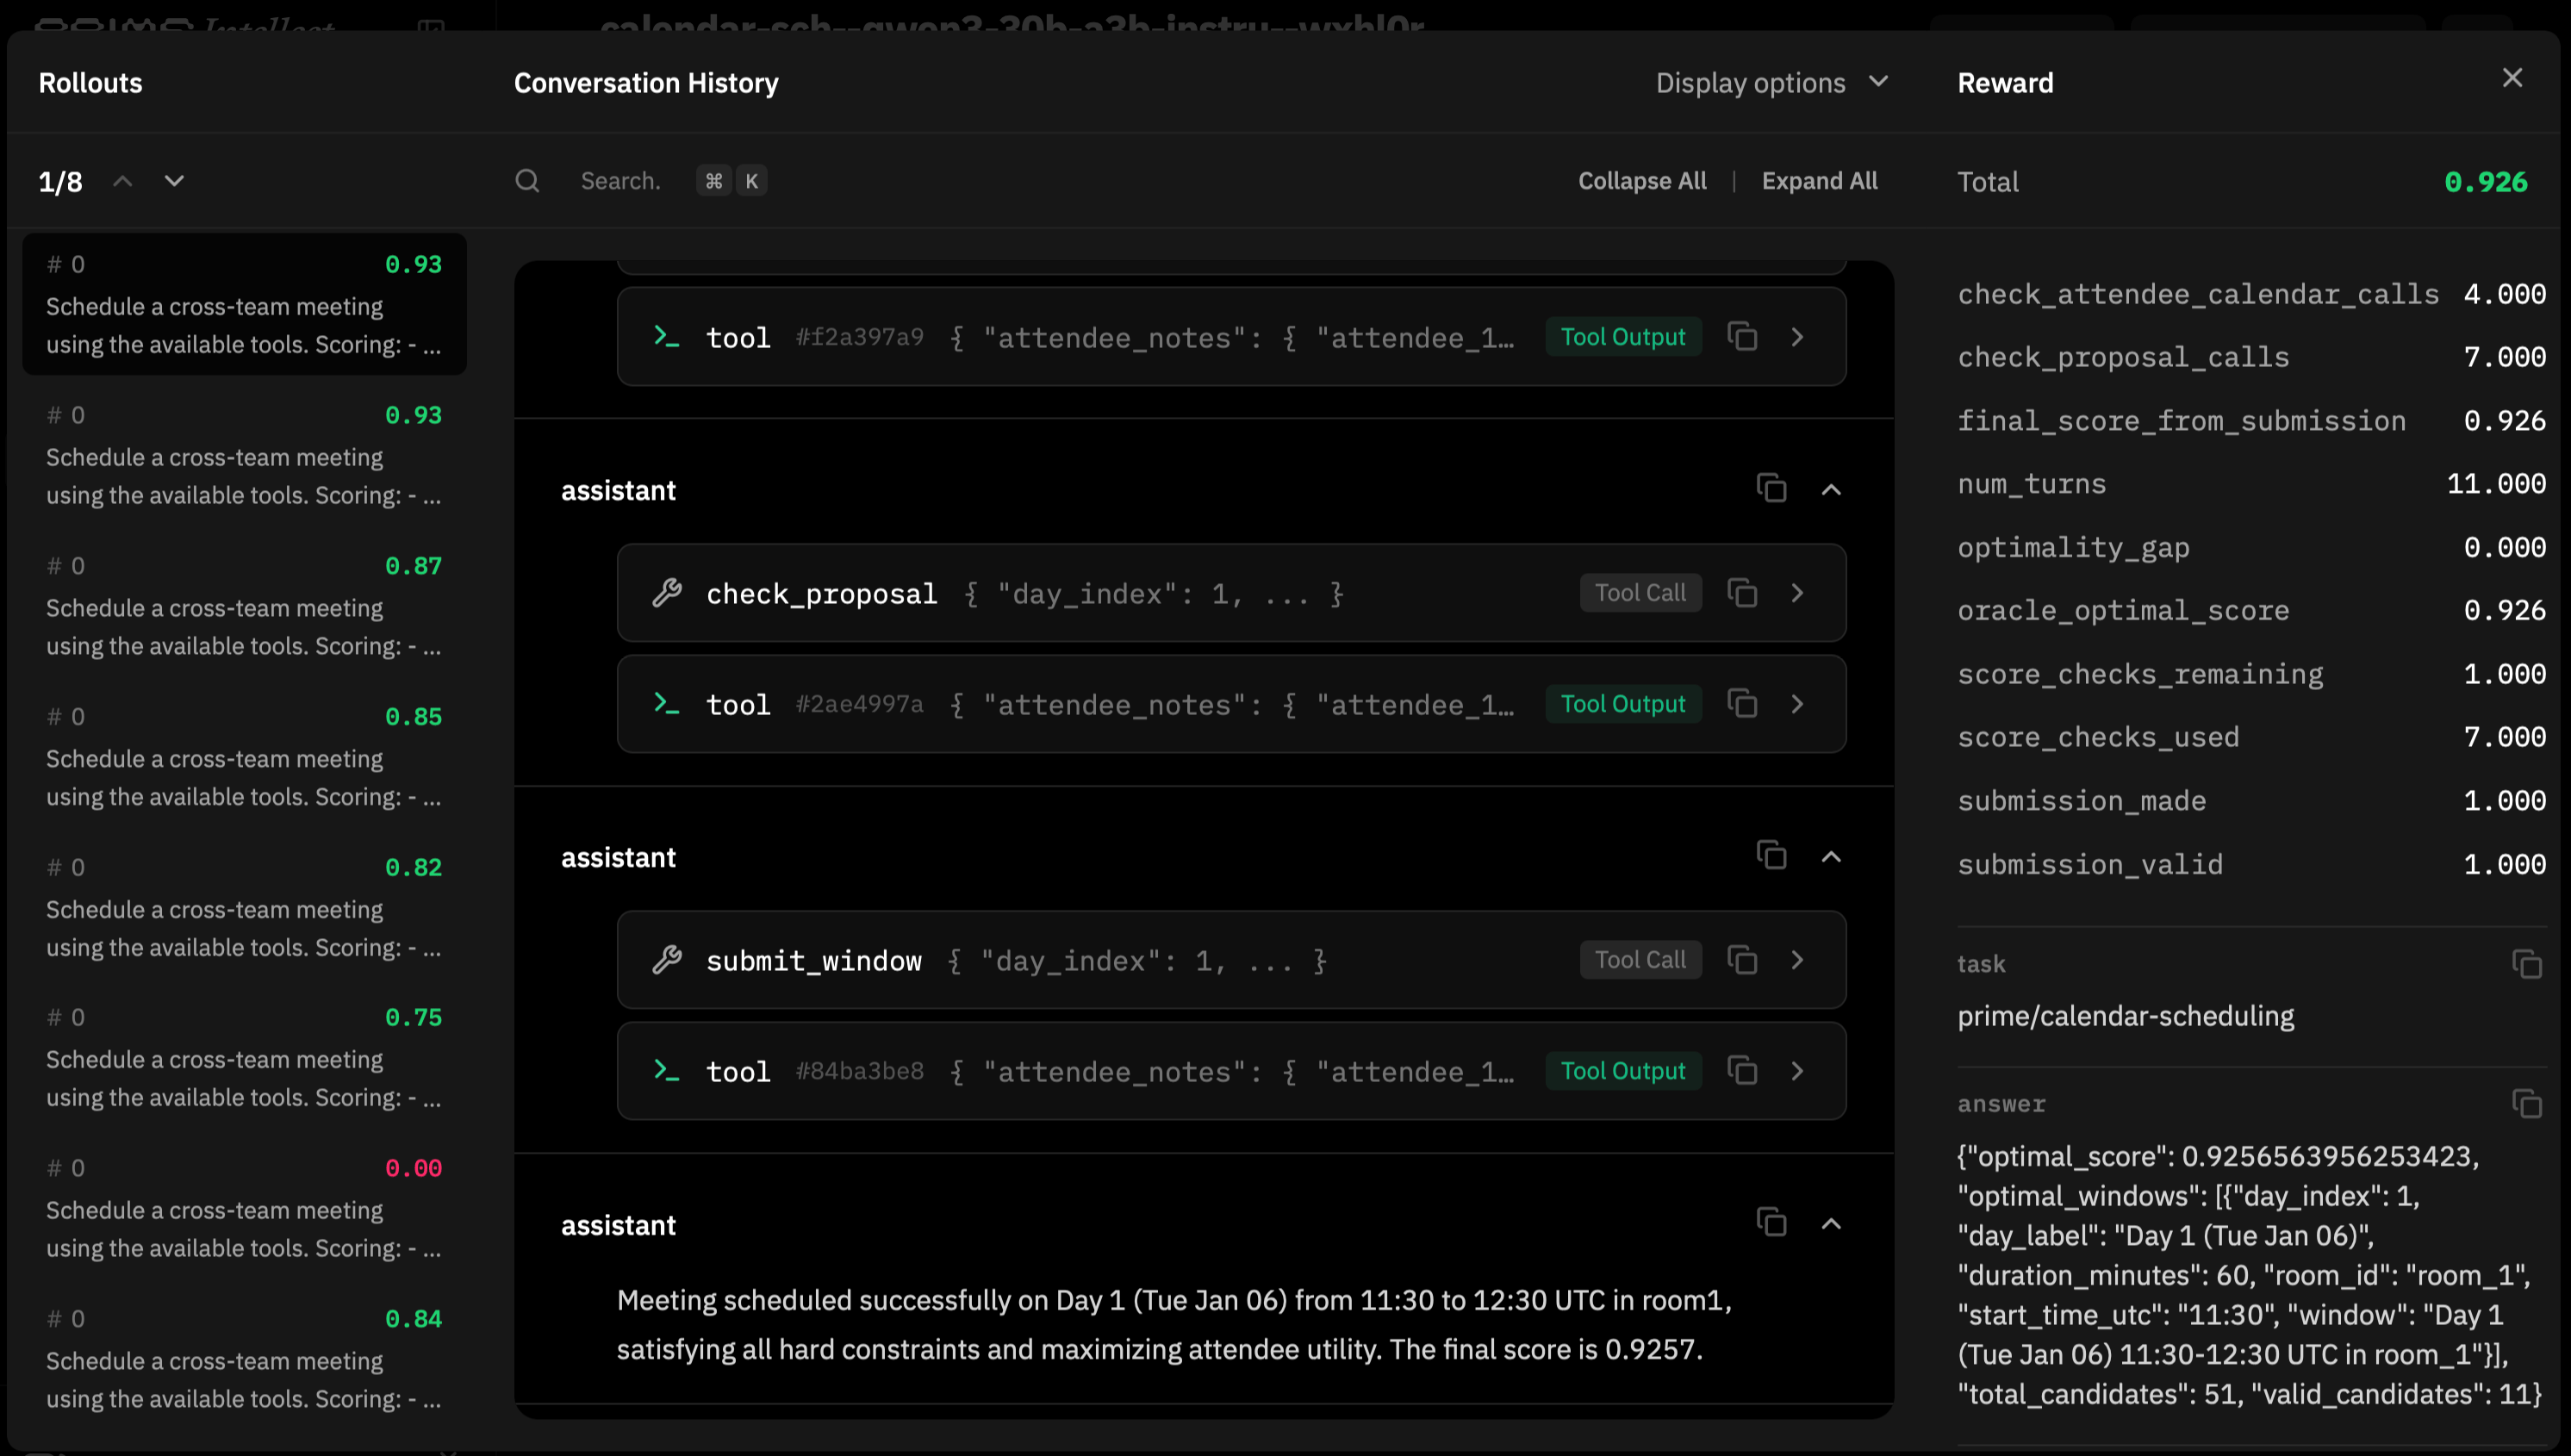
calendar-sch--qwen3-30b-a3b-instru--wxhl0r
Hosted Training
Getting Your Model
This walkthrough was recorded against the shared LoRA service, which produced a deployable adapter at the end of every run. That service has been retired, so the one-click deployment below applies only to adapters you already have: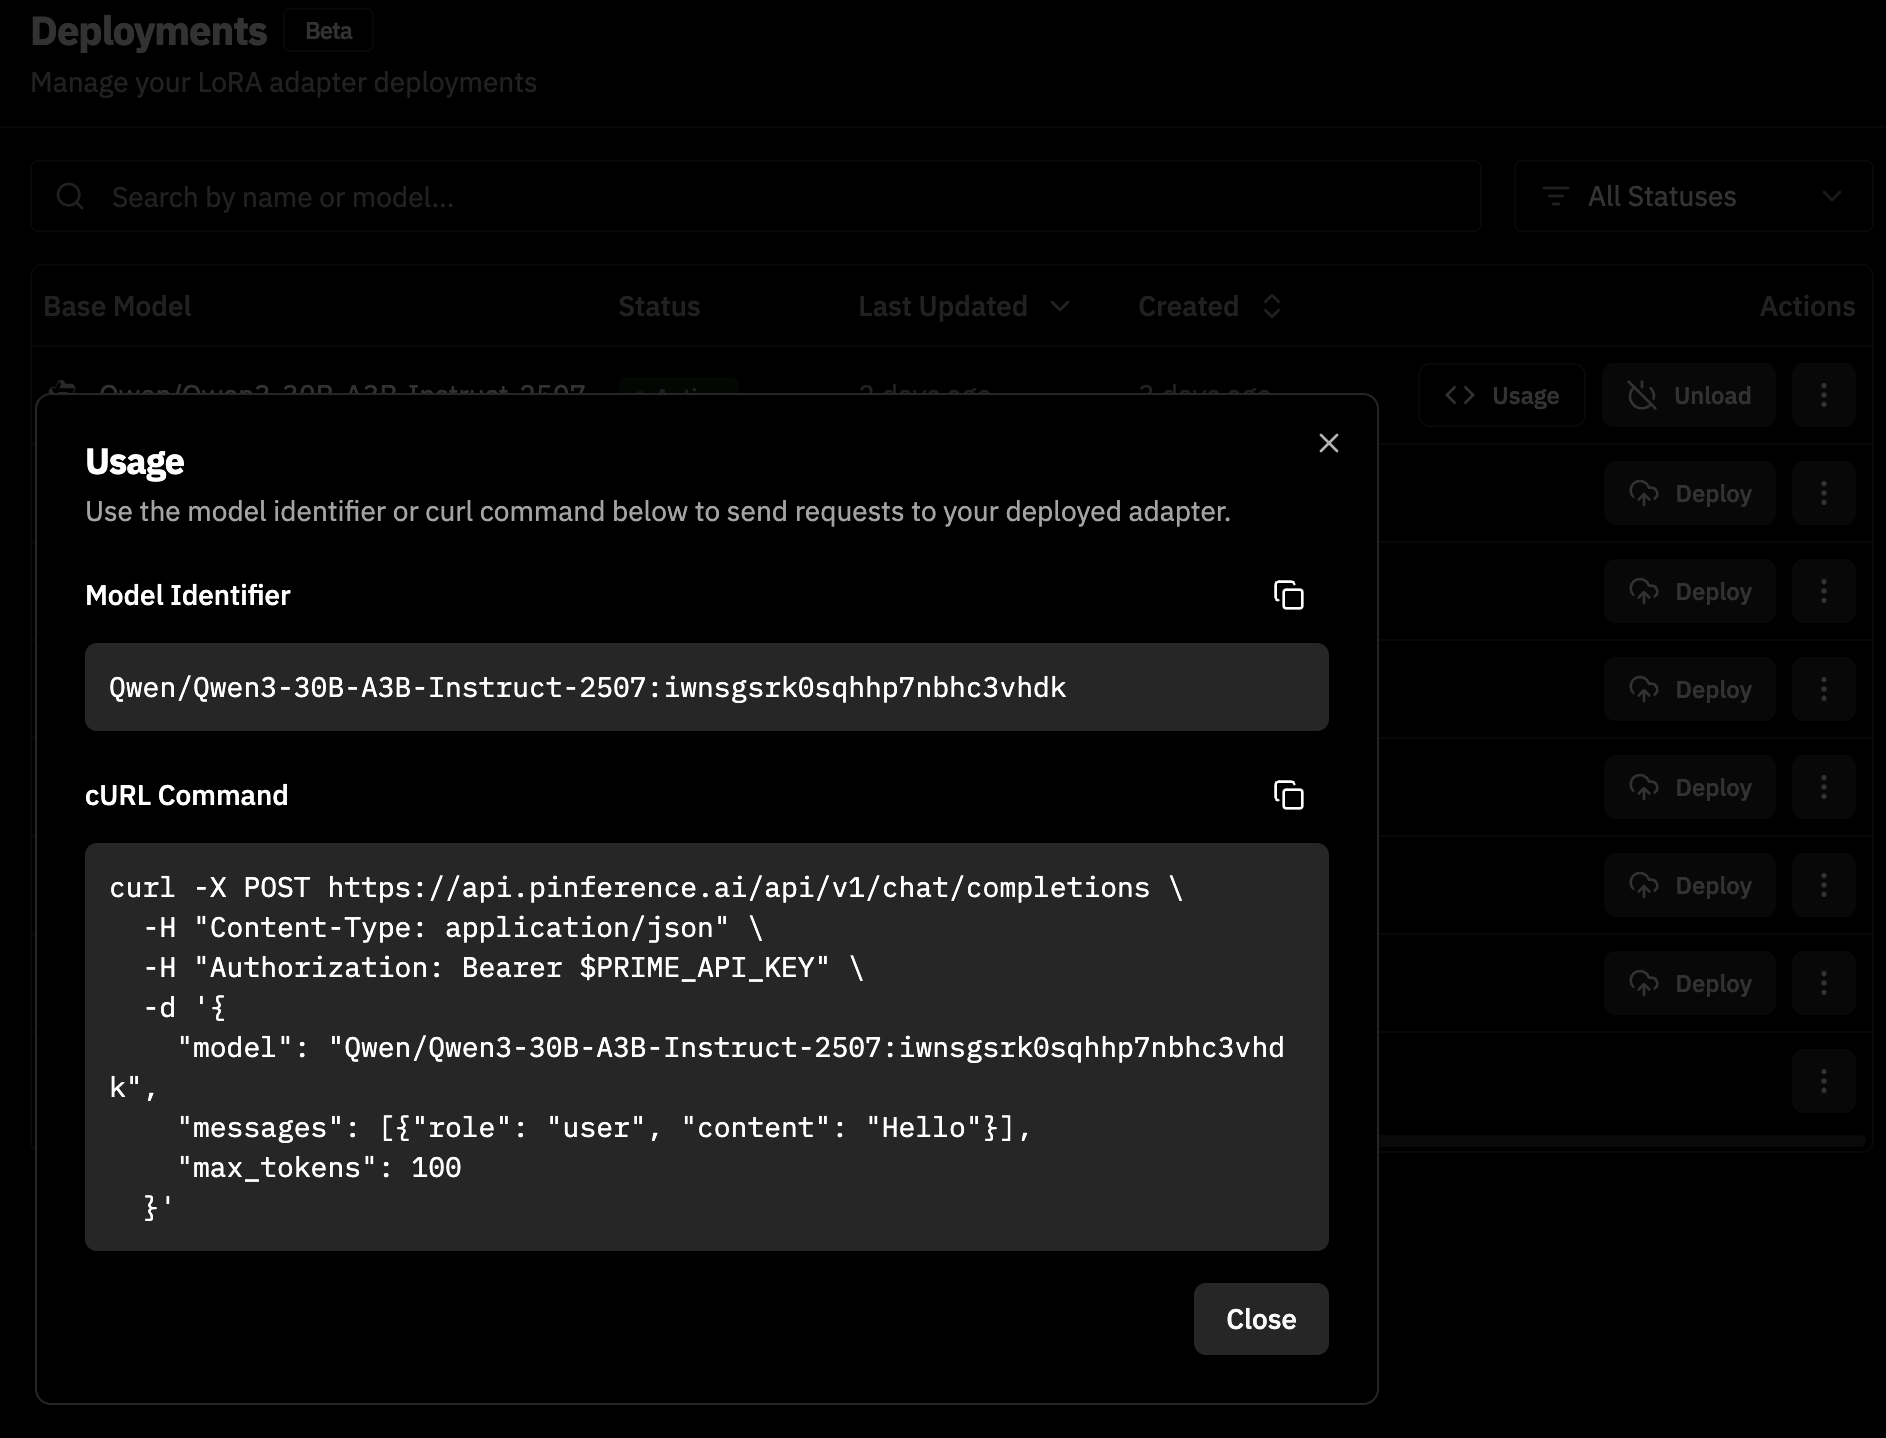
[ckpt], dispatch with --volume, and retrieve the checkpoint with prime volumes get after the volume sync finishes. See Checkpoint settings for retention and cluster-specific requirements, and Step 7 of the End-to-End Run for exporting weights to evaluate or serve.